Overwiev
This post is an upgrade of the great post of Alex Pshul on the same topic.This helped me a lot, thanks to him!
I had to ugrade Alex's port and source code because:
- The new MS doc for MSAL V2 ( @azure/msal-angular V3 ) shows new code for configuration in app.module.ts
- The way on configuring AAD apps in Azure Portal has changed too
- Last, I couldn't complie with Angular 16 Alex's code and other codes found that were all written at leaast 2 years ago.
No post on this topic found for 2 years
Regarding angular 16 SPA, Azure API and MSAL V2, steps are the following:
Azure config and Angular code for SPA authentication
Create an AAD app for your Angular SPA with a redirect url set to http://localhost:4200


Update your @NgModule app.module.ts with this code while replacing the client id and tenaant id by your own values:
@NgModule({
  declarations: [AppComponent, HomeComponent, ProfileComponent],
  imports: [
    BrowserModule,
    BrowserAnimationsModule,
    AppRoutingModule,
    MatButtonModule,
    MatToolbarModule,
    MatListModule,
    HttpClientModule,
    MsalModule.forRoot(
      // MSAL Configuration V2. Mandatory! V1 outside NgModule no longer works
      new PublicClientApplication({
        auth: {
          clientId: "9fefb62c-5e82-4a09-acc3-ea077f8164f3", // Application (client) ID from the app registration
          authority:
            "https://login.microsoftonline.com/994d9022-89d7-44f4-91e2-3851290dc50d", // The Azure cloud instance and the app's sign-in audience (tenant ID, common, organizations, or consumers)
          redirectUri: "http://localhost:4200/", // This is your redirect URI,
        },
        cache: {
          cacheLocation: BrowserCacheLocation.LocalStorage,
          storeAuthStateInCookie: isIE,
        },
      }),
      //MSAL Guard V2.
      null,
      null,
    ),
  ],
  providers:
    [],
  bootstrap: [AppComponent, MsalRedirectComponent],
})
export class AppModule { }
Get the code
I let this post id values in the code to help you.
Microsoft doc on the topic can also help: SPA that signs in users and calls a Web API
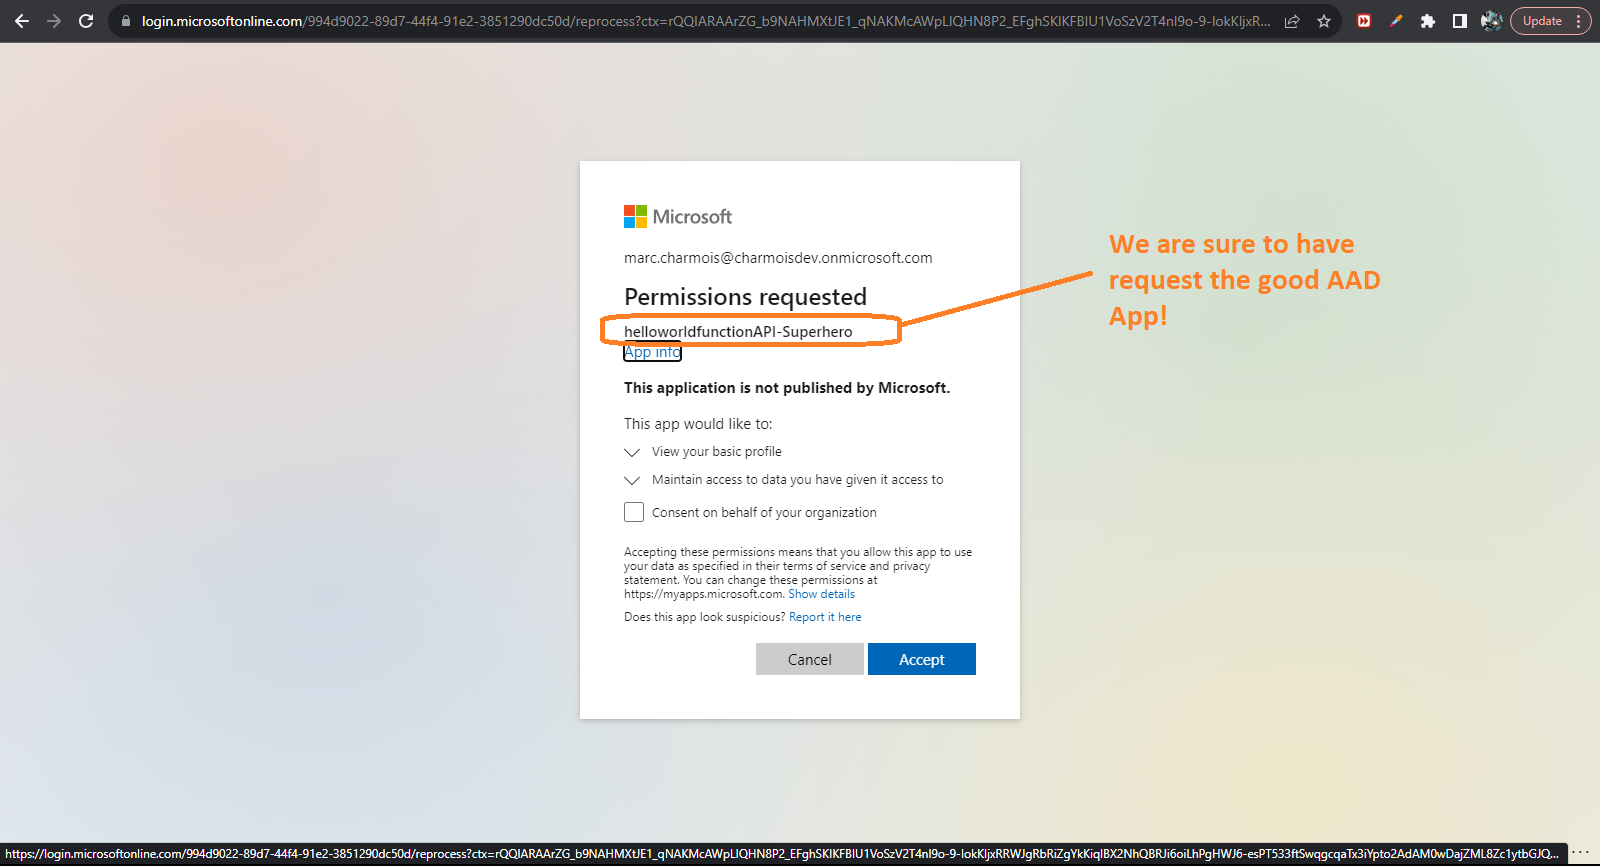
Normally, if you configured well, you should be able to sign in with AAD to your Angular SPA:


Azure config and Angular code for API authentication (SSO)
If you don't have any API for testing you can quickly get one by following the steps described in this previous postFrom the API configuuration in Azure portal click authentication in the left menu. Then click "add identity provider"

It is better to create new app for an api, because, doing this way, Azure will configure your app service to be called and to allow user authentication without problem.
If you choose an existing AAD app, you may have other configurtaions, not done by Azure, to perform yourself at the app service level (json config, web config, etc.)


So click "expose an API" from the left menu, and in the "Expose an API" pane, click "add a client application"

check the scope checkbox that is a delagated permission for users authenticated with the SPA to access the API without needing to sign in again (SSO).


  @NgModule({
  declarations: [AppComponent, HomeComponent, ProfileComponent],
  imports: [
    BrowserModule,
    BrowserAnimationsModule,
    AppRoutingModule,
    MatButtonModule,
    MatToolbarModule,
    MatListModule,
    HttpClientModule,
    MsalModule.forRoot(
      // MSAL Configuration V2. Mandatory! V1 outside NgModule no longer works
      new PublicClientApplication({
        auth: {
          clientId: "9fefb62c-5e82-4a09-acc3-ea077f8164f3", // Application (client) ID from the app registration
          authority:
            "https://login.microsoftonline.com/994d9022-89d7-44f4-91e2-3851290dc50d", // The Azure cloud instance and the app's sign-in audience (tenant ID, common, organizations, or consumers)
          redirectUri: "http://localhost:4200/", // This is your redirect URI,
        },
        cache: {
          cacheLocation: BrowserCacheLocation.LocalStorage,
          storeAuthStateInCookie: isIE,
        },
      }),
      //MSAL guard
      {
        interactionType: InteractionType.Redirect,
        authRequest: {
          scopes: ["api://a30c6d65-3d0b-415e-9dc7-4587fae74e2e/user_impersonation"],
        },
      },
      //interceptor Configuration V2. V1 outside NgModule still works but you must add declaration in providers
      {
        interactionType: InteractionType.Redirect,
        protectedResourceMap: new Map([
          ["https://helloworldfunction1123.azurewebsites.net/", [
                        {
                httpMethod: "GET",
                scopes: ["api://a30c6d65-3d0b-415e-9dc7-4587fae74e2e/user_impersonation"],
            }
        ]]]),
      }
    ),
  ],
  providers:
    [   {
      provide: HTTP_INTERCEPTORS,
      useClass: MsalInterceptor,
      multi: true
    } ],
  bootstrap: [AppComponent, MsalRedirectComponent],
})
MSAL INTERCEPTOR will generate a token and attach it automatically to the http request when your code will call the API
Nothing to do while coding, just use an http-client to call the API!
Don't be bothered by the token generation, header setting and all that stuff. It is like magic!
Get the code
I let anyway commented code in this source code if you want to generate the token and attach it manually to a request.
  //with http Interceptor of MSAL Angular the token is genrated automatically and attached to
  //the http requast so no need to generate it
  //uncomment the lines if you want to use the token and see it anyway
  async getFunctionResponse() {

    let url = "https://helloworldfunction1123.azurewebsites.net/api/powershell-azure-function-helloworldHttpTrigger?";
    //let bearer2 = this.accessToken;
    let headers = new HttpHeaders()
      .set('Content-Type', 'text/html')
      //.set('Authorization', 'Bearer ' + bearer2)

    console.log("headers:")
    console.log(headers)

    return this.http.get(url, { headers, responseType: 'text' }).toPromise()
  }
I let the values of clizent id , tenant id, url of this post in my source code to help you.
Here is the MS doc on this part
If everything is configured properly you should have a response from an API in your SPA: