
You want to ensure that the search results that are returned to the user match what the user wanted to find and that the results that are returned on the first page are the most relevant, so the user does not have to look through several pages of results to find the best matches for their search ?
This is called Search Relevancy!
In this post we are going to learn how to customize SharePoint 2013 search relevance. We will see how to create and deploy custom ranking models and how to test them.

To get the default ranking model template, log on any server in the SharePoint 2013 server farm with Administrator rights.
Create a directory, for example c: \ rankModel
Open a Powershell for SharePoint command prompt and enter the following lines:
This is called Search Relevancy!
In this post we are going to learn how to customize SharePoint 2013 search relevance. We will see how to create and deploy custom ranking models and how to test them.
1 - What you need to do this tutorial
You need: - A SharePoint 2013 Enterprise on premise environment
- Visual Studio 2013 installed on this environment
2 - Definition
The ranking model is an XML file that SharePoint uses to assign a rank for each search result . The display of results is made according to this rank. To adjust the relevance of research in SharePoint 2013 you thus need to write a custom ranking model and deploy it so that it takes into account the preferences of the user in matter of display of results .3 - Start your ranking model customization based on a SharePoint ranking model template
To get the default ranking model template, log on any server in the SharePoint 2013 server farm with Administrator rights.
Create a directory, for example c: \ rankModel
Open a Powershell for SharePoint command prompt and enter the following lines:
$ssa = Get-SPEnterpriseSearchServiceApplication
$owner = Get-SPenterpriseSearchOwner -Level ssa
$defaultRankingModel = Get-SPEnterpriseSearchRankingModel -SearchApplication $ssa -Owner $owner | Where-Object { $_.IsDefault -eq $True }
$twoLinearStagesRankingModel.RankingModelXML > c:\rankmodel\defaultRankingModel.xml
Note: Microsoft recommends to use a two linear ranking model (it is a different and newer xml structure). To use it, you have, at least, to update your SharePoint Farm with the SharePoint Server 2013 cumulative update that was published in March 2014.

After having executed the previous SherPoint Powershell instructions, you will see appear the requested ranking model as an xml file in the c:\rankmodel folder.
Then, open the defaultRankingModel.xml, xml file into a text editor.

Note that the ranking model template is identified by an unique GUID.
It is a console application.
This tool allows to easily test an application after having deployed a custom ranking model without having to register each time the new rankig model in search results web part which is tedious for testing.
You can find the package ready to use in CodePlex: SPSearchRankingModelTester-package .
You can find the source code of this application in the codePlex project, or in my GitHub repositery: SP2013searchRankingModelTester
4.1 Deploying SP2013searchRankingModelTester
Copy the downloaded package on a server of the SharePoint 2013 Farm, unzip it.
Modify the exe.config file: change the "value" attribute of the SPsiteAddress key and use the site collection where you want to test the search with a specific ranking model. For exemple, you can use the Url of a your SharePoint 2013 search center.
4.2 Using the SP2013searchRankingModelTester
Double click the .exe file.
The console application is opening and displaying your site collection Url (the one referenced in the exe.config file).
You are then, prompted for a request. Type your request.
Then, you are prompted for the GUID of your ranking model.
Make a right-click on the top of the window to paste the GUID you have previously copied from the xml file:

In the next screen shot, I use the GUID of the SharePoint 2013 default ranking model.
Once the ranking model GUID typed and the "enter" key pressed, the console application displays the 50th first relevant results according to the ranking model you specified.

There is several ways to customize a ranking model. The xml syntax and the ways to focus on a special point for relevance is not easy to understand. You can refer first to the official Microsoft documentation. I am first giving a quick overview of it, then I will explain how to test your changes with several tools.
Roughly you can act on:
6.1 Description of the custom ranking model
In the Microsoft documentation, you will find two samples of customized ranking model. Let's show how to deploy and test the second one.
This ranking model with one linear stage contains these four rank features:
6.2 Custom ranking model deployment
Copy the previous xml in a file and name this file RankingModel2.xml. Copy this file in the previous folder c:\rankmodel.
Then, execute the following Powershell for SharePoint instructions:
$myRankingModel = Get-Content c:\rankmodel\ RankingModel2.xml
$myRankingModel = [String]$myRankingModel
$ssa = Get-SPEnterpriseSearchServiceApplication
$owner = Get-SPenterpriseSearchOwner -Level ssa
$newrm = New-SPEnterpriseSearchRankingModel -SearchApplication $ssa -Owner $owner -RankingModelXML $myRankingModel
Here is the screenshot for control:

6.3 testing the custom ranking model
To test the custom ranking model, we just have to use the previous tool. So double click on the .exe and this time after having typed the query, type the GUID of the custom ranking model:
DE48A3A1-67CE-44A2-9712-E8A5128787CF
You will see that the results are sorted in a completely different way accorded to the new and custom ranking model:

As I wrote before, understanding the syntax of the ranking model is a difficult work to achieve. By being able to test quickly the modifications of a custom ranking model you can improve your knowledge of the syntax, rules, formula and so on.
We are going to see more tools to do this...
7.1 Tools overview and prerequisites
The two tools that we are going to demonstrate are Add-Ins for SharePoint ( formerly called Apps) .
I will not deny that the requirements to use these tools are difficult to carry out even for a SharePoint developer.
It takes a very good knowledge of SharePoint administration to use these tools because:
7.2 Mavention Explain Rank
Overview
SharePoint 2013 has the ExplainRank.aspx page which is a truly hidden gem, that displays the rankdetail for a single item in a more comprehensible way. However, this page is not working! (see Waldek Mastykarz's post on the subject.
Fortunately, there is a similar and free(!) tool (a SharePoint Add-In) that allows you to do the same.
This Add-In allows to query and for each result to understand the different values assigned by the ranking model and explains its place in the ordering of results.
This is very educational when we want to understand how the ranking model is working.
Installation
Log in as Administrator on the research center of the SharePoint environment. Use the upper left menu to add the Add-In (app)

In the "Apps" search box enter the name of the publisher " Mavention " to display the catalog.
Locate « Explain Rank » Add-In.

Click the Add-In to deploy it and give it the appropriate permissions.

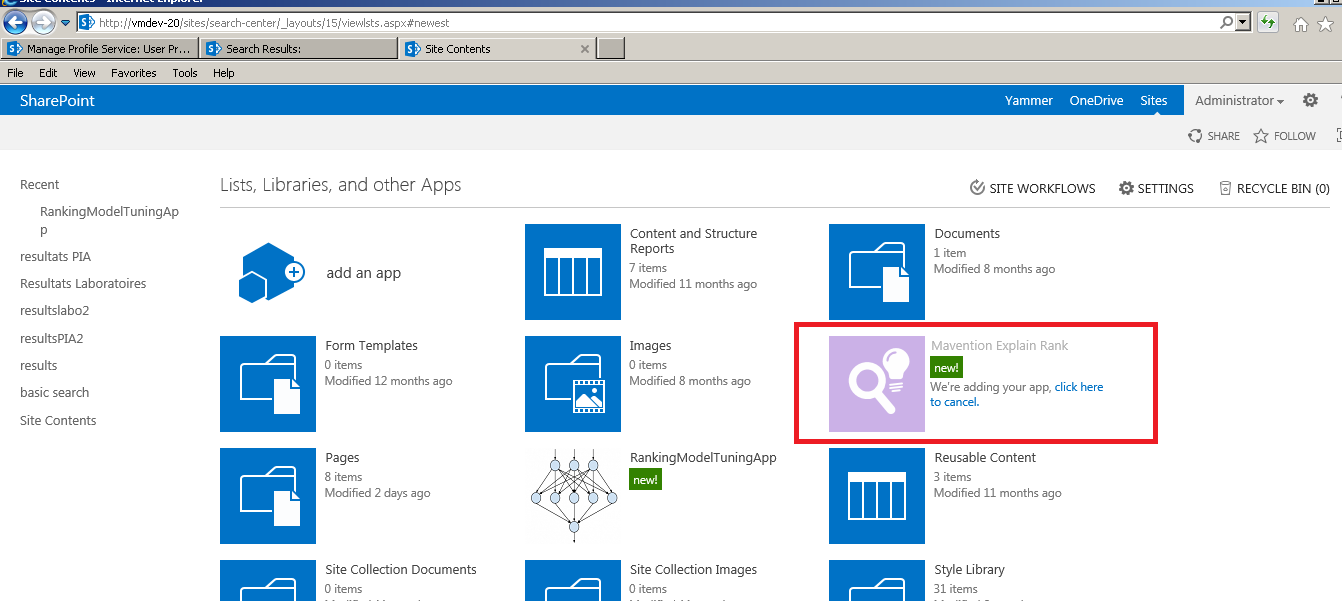
Once deployed, the add-in appears in usable the Add-In ( Apps) and can be used .
Using the "Explain Rank" Mavention Add-In
Open the Add- In home page and enter a query.
Start the query

Before each result a radio button helps to understand how the ranking model has awarded this rank for this result : what used properties and weight related to the presence of a particular word of the request in a particular property.
This allows us to better understand how a standard or a custom ranking model is acting in the ordering of results.
7.3 Ranking Model Tuning
Overview
This Add-in is more difficult to use than the previous one. It helps doing what we have done previously that is to mean "creating a custom ranking model", but in a guided manner , and without having to manipulate the xml.
Installation
Proceed as for the Add-In " Explain Rank " of Mavention , but instead of entering Mavention in the search box, enter the name of the Add-In " Ranking Model Tuning ".
Then install the Add-In .

Using the "Ranking Model Tuning" Add-In
The home page of the Add-In presents different ranking models that can serve as a basis to create a customized one. You just have to copy one to work on it.

Once the copy made we can start customizing the copied ranking model.

There are two macro- features : "Adding a judgment sets " or "Adding a rank features"


When you copy an existing ranking model, the new ranking model contains the same rank features and weights as in the base model. You can add more managed properties as additional rank features, remove existing features, or tune the weight of existing features.


Conclusion
This tool helps improve understanding of the xml of a ranking model since he automatically generates the xml based on instructions given by the Add-In UI. Then simply retrieving the new ranking model in xml format to understand how to transform the rules in a well formatted and consistent ranking model xml.
At best, the tool may be suitable for customisations needs of a ranking model without any need to work on the xml.
These various tools and practices can be used to define several approaches to constitute the ranking model appropriate for your needs, although it seems to require a large amount of time for testing and researching to achieve real expertise and mastery of the subject.
Aknowledgements
After having executed the previous SherPoint Powershell instructions, you will see appear the requested ranking model as an xml file in the c:\rankmodel folder.
Then, open the defaultRankingModel.xml, xml file into a text editor.
Note that the ranking model template is identified by an unique GUID.
4 - Test the ranking model template (first tool)
I developed a tool, the SPsearchRankingModelTester that can test the relevance of the search results according to a given ranking model (Thanks to Johan Olivier).It is a console application.
This tool allows to easily test an application after having deployed a custom ranking model without having to register each time the new rankig model in search results web part which is tedious for testing.
You can find the package ready to use in CodePlex: SPSearchRankingModelTester-package .
You can find the source code of this application in the codePlex project, or in my GitHub repositery: SP2013searchRankingModelTester
4.1 Deploying SP2013searchRankingModelTester
Copy the downloaded package on a server of the SharePoint 2013 Farm, unzip it.
Modify the exe.config file: change the "value" attribute of the SPsiteAddress key and use the site collection where you want to test the search with a specific ranking model. For exemple, you can use the Url of a your SharePoint 2013 search center.
4.2 Using the SP2013searchRankingModelTester
Double click the .exe file.
The console application is opening and displaying your site collection Url (the one referenced in the exe.config file).
You are then, prompted for a request. Type your request.
Then, you are prompted for the GUID of your ranking model.
Make a right-click on the top of the window to paste the GUID you have previously copied from the xml file:
In the next screen shot, I use the GUID of the SharePoint 2013 default ranking model.
Once the ranking model GUID typed and the "enter" key pressed, the console application displays the 50th first relevant results according to the ranking model you specified.
5 - Tune your ranking model with rank features
There is several ways to customize a ranking model. The xml syntax and the ways to focus on a special point for relevance is not easy to understand. You can refer first to the official Microsoft documentation. I am first giving a quick overview of it, then I will explain how to test your changes with several tools.
Roughly you can act on:
- BM25 rank feature ranks items
You specify a property like "body" (the content of the crawled or indexed item) or "Title" (the title of the crawled or indexed item) and give that property a weight in order the relevance to more or less take into account this property.
You can also specify the document length normalization for each property: a title is usually composed with few words although the body is rather long and the query is also usually composed with a few words. So you can tell your ranking model that a single occurence of one of the keywords of the query in the body has the same importance than a single occurence of one of the keywords of the query in the title
- Weight groups
You tune this in the Advanced Search Settings, using the search schema feature in the Search service application.
For example, you create a new managed property of the type string that contains about ten words or less. You consider this new managed property to be about as important as the existing managed property Title. In that case, you should map the new managed property to context 1.
Another example. You create a managed property of the type string that contains lots of words, for example a description of something. You should map this new managed property to context 7 because it is similar to the managed property Body, both in length as well as in importance.
- static rank feature ranks items
The static rank feature ranks items based on numeric managed properties that are stored in the search index. The numeric managed properties used for relevance rank calculation in static rank features must be of type Integer and set to Refinable or Sortable in the search schema. You can’t use multivalued managed properties in combination with the static rank feature.
For example, UrlDepth is a typical static rank: the less url to reach the result is long, the more that result is relevant.
Another example: you can make your content to be rated by users and make a static rank with this rating.
- Bucketed static
The bucketed static rank feature ranks documents based on their file type and language. You can tell your model that a .pdf in english is more relevant than a .docx in french.
- Proximity rank feature
The proximity rank feature ranks items depending on the distance between query terms inside the full-text index. The rank score is boosted if two query terms appear in the same managed properties within the full-text index. Proximity calculations are expensive in terms of disk activity and CPU consumption; as a result, proximity boost is carried out only during the second stage of the default SharePoint Server 2013 rank model (if available).
- The dynamic rank feature
It seems to use this if you want to boost a specific property:
The dynamic rank feature ranks an item depending on whether the query property matches a given managed property. If there is a match, the item’s rank score is multiplied with a specific value to distinguish that particular item. The weight attribute is used to control how much this feature affects the overall rank score.
Note
The dynamic rank feature is not customizable; it’s for internal use only. However, if you install the SharePoint Server 2013 cumulative update of August 2013, the AnchortextComplete rank feature is a customizable dynamic rank feature that is part of the default ranking model.
- Freshness
The default SharePoint 2013 ranking model doesn’t boost the rank of search results based on their freshness. You can achieve this by adding a new static rank feature that combines information from the LastModifiedTime managed property with the DateTimeUtcNow query property, using the freshness transform function. The freshness transform function is the only transform that you can use for this freshness rank feature, because it converts the age of the item from an internal representation into days.
6 - Testing a custom ranking model
6.1 Description of the custom ranking model
In the Microsoft documentation, you will find two samples of customized ranking model. Let's show how to deploy and test the second one.
This ranking model with one linear stage contains these four rank features:
- BM25 This rank feature is based on managed properties Title and body; the w attribute for title is set so that hits of query terms in Title are two times (2x) more important than hits of query terms in body.
- UrlDepth This rank feature is based on the UrlDepth managed property, which is available by default in SharePoint installations. UrlDepth contains the number of backslashes (\) in the URL of a document. The inverse rational (InvRational) transform ensures that documents with shorter URLs receive higher rank scores.
- TitleProximity This rank feature boosts documents if some of the query terms occur close to each other in the title of these documents.
InternalFileType This rank feature boosts documents of type HTML, DOC, XLS, or PPT. The names of the buckets in the definition of the rank model are provided for readability only.
<?xml version="1.0"?>
<rankingmodel2stage name=" RankModel2"
                    description="Rank model -- example 2"
                    id="DE48A3A1-67CE-44A2-9712-E8A5128787CF"
                    xmlns="urn:Microsoft.Search.Ranking.Model.2NN">
    <rankingmodel2nn id="A0A030D1-805D-437E-A001-CC151ED7473A" precalcEnabled="0">
        <hiddennodes count="1">
            <thresholds>
                <threshold>0</Threshold>
            </Thresholds>
            <layer2weights>
                <weight>1</Weight>
            </Layer2Weights>
        </HiddenNodes>
        <rankingfeatures>
            <bm25main name="BM25" k1="1">
                <layer1weights>
                    <weight>1</Weight>
                </Layer1Weights>
                <properties>
                    <property name="Title" propertyName="Title" w="2" b="0.5" />
                    <property name="body" propertyName="body" w="1" b="0.5" />
                </Properties>
            </BM25Main>
            <static name="UrlDepth" propertyName="UrlDepth" default="1">
                <transform type="InvRational" k="1.5"/>
                <layer1weights>
                    <weight>0.5</Weight>
                </Layer1Weights>
            </Static>
            <minspan name="TitleProximity" propertyName="Title" default="0" maxMinSpan="1" isExact="0" isDiscounted="0">
                <normalize SDev="1" Mean="0"/>
                <transform type="Linear" a="1" b="-0.5" maxx="2"/>
                <layer1weights>
                    <weight>1.2</Weight>
                </Layer1Weights>
            </MinSpan>
            <bucketedstatic name="InternalFileType" propertyName="InternalFileType" default="0">
                <bucket name="http" value="0">
                    <hiddennodesadds>
                        <add>1.5</Add>
                    </HiddenNodesAdds>
                </Bucket>
                <bucket name="doc" value="1">
                    <hiddennodesadds>
                        <add>2.5</Add>
                    </HiddenNodesAdds>
                </Bucket>
                <bucket name="ppt" value="2">
                    <hiddennodesadds>
                        <add>0.5</Add>
                    </HiddenNodesAdds>
                </Bucket>
                <bucket name="xls" value="3">
                    <hiddennodesadds>
                        <add>-3.5</Add>
                    </HiddenNodesAdds>
                </Bucket>
            </BucketedStatic>
        </RankingFeatures>
    </RankingModel2NN>
</RankingModel2Stage>
6.2 Custom ranking model deployment
Copy the previous xml in a file and name this file RankingModel2.xml. Copy this file in the previous folder c:\rankmodel.
Then, execute the following Powershell for SharePoint instructions:
$myRankingModel = Get-Content c:\rankmodel\ RankingModel2.xml
$myRankingModel = [String]$myRankingModel
$ssa = Get-SPEnterpriseSearchServiceApplication
$owner = Get-SPenterpriseSearchOwner -Level ssa
$newrm = New-SPEnterpriseSearchRankingModel -SearchApplication $ssa -Owner $owner -RankingModelXML $myRankingModel
Here is the screenshot for control:
6.3 testing the custom ranking model
To test the custom ranking model, we just have to use the previous tool. So double click on the .exe and this time after having typed the query, type the GUID of the custom ranking model:
DE48A3A1-67CE-44A2-9712-E8A5128787CF
You will see that the results are sorted in a completely different way accorded to the new and custom ranking model:
As I wrote before, understanding the syntax of the ranking model is a difficult work to achieve. By being able to test quickly the modifications of a custom ranking model you can improve your knowledge of the syntax, rules, formula and so on.
We are going to see more tools to do this...
7 - More tools to learn how to customize a SharePoint 2013 search ranking model
7.1 Tools overview and prerequisites
The two tools that we are going to demonstrate are Add-Ins for SharePoint ( formerly called Apps) .
I will not deny that the requirements to use these tools are difficult to carry out even for a SharePoint developer.
It takes a very good knowledge of SharePoint administration to use these tools because:
- The Apps Settings for a SharePoint environment is difficult (especially on a local environment because of, for example, the creation the subdomain) and does not always work at the first time. You have sometimes to delete the service and recreate it for making it work.
- One of these tools requires at least ( without it being mentioned in its documentation!), the activation of the User Profile Service Application that requires a lot of expertise ( especially for a local SharePoint 2013 environment)
7.2 Mavention Explain Rank
Overview
SharePoint 2013 has the ExplainRank.aspx page which is a truly hidden gem, that displays the rankdetail for a single item in a more comprehensible way. However, this page is not working! (see Waldek Mastykarz's post on the subject.
Fortunately, there is a similar and free(!) tool (a SharePoint Add-In) that allows you to do the same.
This Add-In allows to query and for each result to understand the different values assigned by the ranking model and explains its place in the ordering of results.
This is very educational when we want to understand how the ranking model is working.
Installation
Log in as Administrator on the research center of the SharePoint environment. Use the upper left menu to add the Add-In (app)
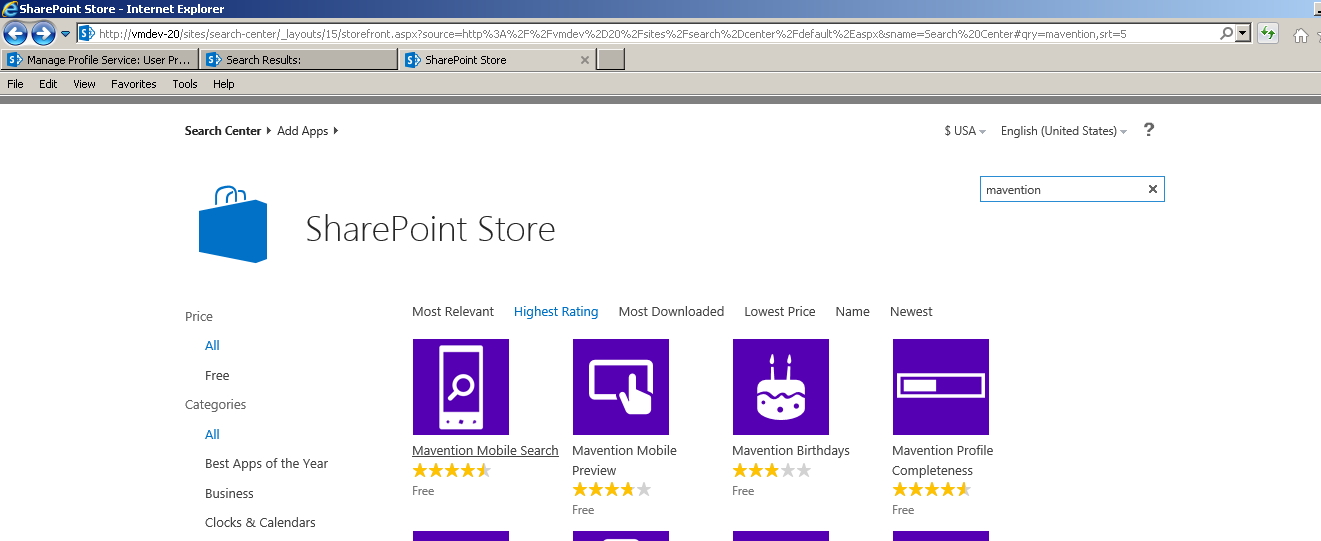
In the "Apps" search box enter the name of the publisher " Mavention " to display the catalog.
Locate « Explain Rank » Add-In.
Click the Add-In to deploy it and give it the appropriate permissions.
Once deployed, the add-in appears in usable the Add-In ( Apps) and can be used .
Using the "Explain Rank" Mavention Add-In
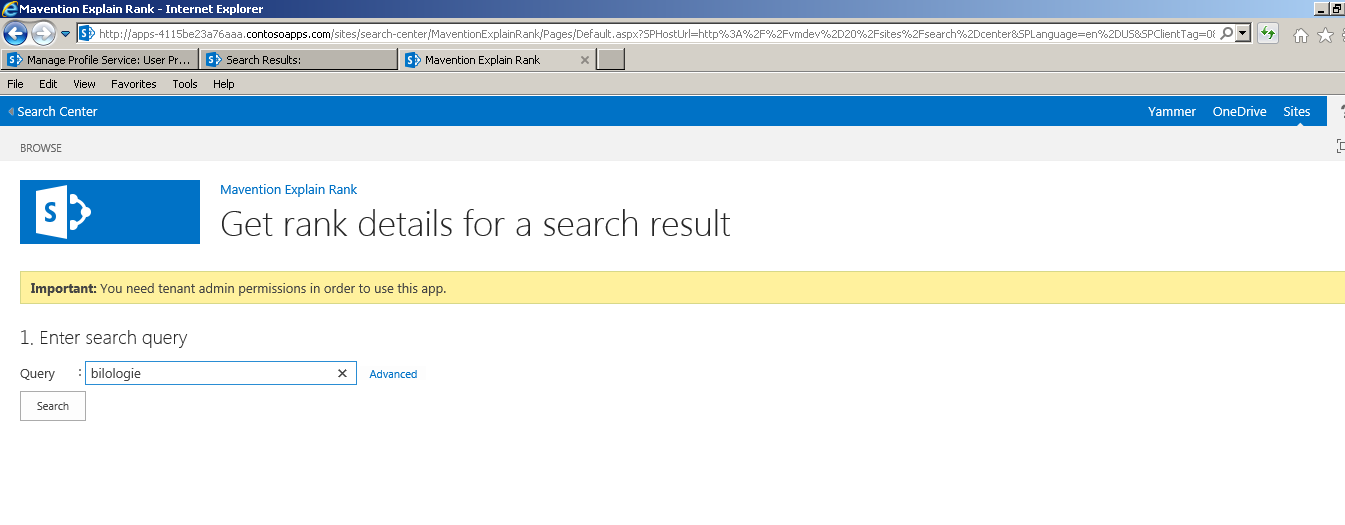
Open the Add- In home page and enter a query.
Start the query
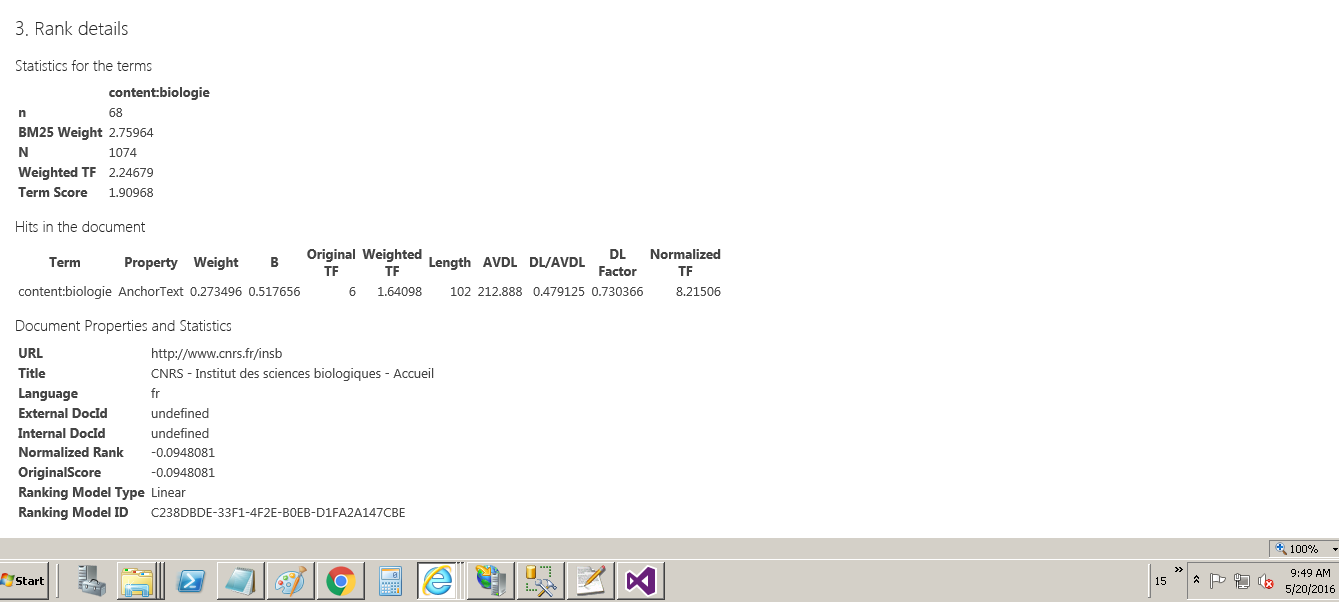
Before each result a radio button helps to understand how the ranking model has awarded this rank for this result : what used properties and weight related to the presence of a particular word of the request in a particular property.
This allows us to better understand how a standard or a custom ranking model is acting in the ordering of results.
7.3 Ranking Model Tuning
Overview
This Add-in is more difficult to use than the previous one. It helps doing what we have done previously that is to mean "creating a custom ranking model", but in a guided manner , and without having to manipulate the xml.
Installation
Proceed as for the Add-In " Explain Rank " of Mavention , but instead of entering Mavention in the search box, enter the name of the Add-In " Ranking Model Tuning ".
Then install the Add-In .
Using the "Ranking Model Tuning" Add-In
The home page of the Add-In presents different ranking models that can serve as a basis to create a customized one. You just have to copy one to work on it.
Once the copy made we can start customizing the copied ranking model.
There are two macro- features : "Adding a judgment sets " or "Adding a rank features"
When you copy an existing ranking model, the new ranking model contains the same rank features and weights as in the base model. You can add more managed properties as additional rank features, remove existing features, or tune the weight of existing features.
Conclusion
This tool helps improve understanding of the xml of a ranking model since he automatically generates the xml based on instructions given by the Add-In UI. Then simply retrieving the new ranking model in xml format to understand how to transform the rules in a well formatted and consistent ranking model xml.
At best, the tool may be suitable for customisations needs of a ranking model without any need to work on the xml.
These various tools and practices can be used to define several approaches to constitute the ranking model appropriate for your needs, although it seems to require a large amount of time for testing and researching to achieve real expertise and mastery of the subject.
Aknowledgements
