
Introduction
This post shows how to quicly deploy a Node.js API to an Azure App Service empty Web App using only manual operations.
It is an update of the old post written 2 years ago. "Try App Service" is a portal offered by Microsoft Azure that allows you to test the App Services Web App quickly without having to use the credit card information.
Normally, when you want to give a try to Azure Portal you can open a free account for one month but you have to provide Microsoft with a credit card information. With the "Try Azure App Service" feature you can play with Web App during one hour by just signing with a social account (Live (Microsoft), Google +, Facebook, Github).
You can also test Web App for Containers but you must have a Microsoft account (need to already have an Azure Porrtal so need to have given your credit cards informations previously)

You notice that there is only 2 types of Web App available. Previously, until mid 2018, we had API App and Serverles Apps (Logic App and Function). But there was dramatic changes in App Servics from mid 2018. You can consult my other post if you want to know more on this topic.
You are then invited to choose the type of App Service you want to try. There is not a lot of choice. As we don't use containers we have to select the Web App. You will see that you can totally use a Web App for hosting a Node.js REST API. From summer 2018, the only resource running an application (Web site, API, Mobile Backend) in Azure App Services, is the Web App .
Thus, select the Web App, then click Next.

Now is the time to chose the template.
Before 2018 we had a template Node.js + Express but is has been removed. The others were left.
Anyway, you will see that an Azure App Services "Empty Site" is "smart enough" to "understand" that we are going to deploy a Node.js RESTful API on it and make it work.
Thus chose the empty Web App and click on "Create".
As wrritten previously you can use one of the 4 social networks account to sign in : Microsoft (live), Google +, Facebook, Github. For the demonstration I will use my Live account.


Then, Azure is provisionning your App Service in a few seconds.

And an ONE Hour countdown is starting lettting you play with the Azure App Service and the Azure Portal within this hour.

Before mid 2018, we were able to go to the Azure Portal from this UI and see the porperties of the Web App but it's over now. We were also able to change the API file code online using the App Service Editor (Visual Studio Code online), but it has been replaced by Kudu. However, this is not a bad thing, because we are going to use Kudu to deploy manually our Node.js RESTful API!
Download the Contact List REST API sample on my Github repositery.

Place the downloaded zip file in your local dev repositery and for Windows, right-click it and locate Extract All in the contextual menu.

On next screen delete the last segment of the path for not having this folder created twice as a main folder and a sub folder with exactly the same name.

You should obtain this view (for Windows) after having extracted the GitHub sample zip file.

You can then go back to the Microsoft Azure "Try Azure App Service" this time to use the button "Edit your code online" to open Kudu in this version of "try Azure App Service" (in the last version this link was opening App Service Editor).

You land on the Kudu welcome page

Next locate the CMD menu item and open it

then navigate to wwwroot by clicking on Site.


Click on the folder wwwroot to open it. Drag and drop all the folders and files excepted iisnode.yml and web.config (and of course, test, gitignore and readme) in the wwwroot folder in your browser.

The first upload takes time because of the node_modules folder but in a few minutes you should get this:

then drag and drop iisnode.yml, and finally the web.config file.


You can now come back to your Try App Service welcome page to click on the API url.

You should obtain this result. I customized the out of the box welcome page of the Try App Service Web App:

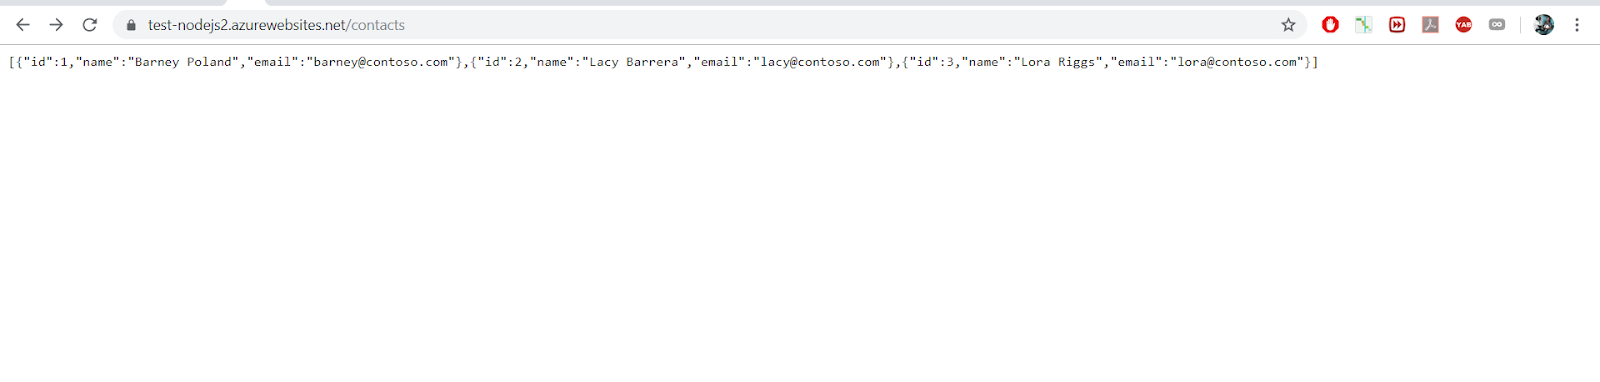
If you click on the "See contacts" button, you will see the Azure Web App serving the JSON of your Restful your API.
If you clcik on the "Use Swagger" button, you will be able to test your API with swagger UI:


Assume we want to add a new contact to our API. We just have to write it on the proper file and it is possible with Kudu, so open the file contacts.json located in the lib folder


Add a new contact and don't forget to save the file.

Now, if you test in Swagger you see that your change wasn't taken into account.

Why ? Because your data are in cache and you have to restart the web App for them to be taken into account. One good way to this on Windows server is to do an IISReset. Let's try to do this.

Of course, not a surprise, you cannot restart a Web App that way on the platform "Try Azure App Service". But I will show you a trick to do it anyway:
Locate the web.config file at the root of your site an open it.

Change something not really relevant for the file, like removing an empty line.

Don't forget to save your change, then, test again by refreshing your Swagger UI page. You notice that the page refresh is a little bit longer than usual. It is normal, a change in the web.config file makes restart the Web App and when refreshing, it is a little bit longer, because IIS must reload the dll and the cache to run your API. You can then see your changes appear!


Enjoy folks!
It is an update of the old post written 2 years ago. "Try App Service" is a portal offered by Microsoft Azure that allows you to test the App Services Web App quickly without having to use the credit card information.
Normally, when you want to give a try to Azure Portal you can open a free account for one month but you have to provide Microsoft with a credit card information. With the "Try Azure App Service" feature you can play with Web App during one hour by just signing with a social account (Live (Microsoft), Google +, Facebook, Github).
You can also test Web App for Containers but you must have a Microsoft account (need to already have an Azure Porrtal so need to have given your credit cards informations previously)
Creating a Web App for an one hour trial
So let's deploy a Node.js REST API into this type of Azure App Service, totally free and without any commitment For enjoying this Azure feature, reach the welcome page of "Try Azure App Service"
You notice that there is only 2 types of Web App available. Previously, until mid 2018, we had API App and Serverles Apps (Logic App and Function). But there was dramatic changes in App Servics from mid 2018. You can consult my other post if you want to know more on this topic.
You are then invited to choose the type of App Service you want to try. There is not a lot of choice. As we don't use containers we have to select the Web App. You will see that you can totally use a Web App for hosting a Node.js REST API. From summer 2018, the only resource running an application (Web site, API, Mobile Backend) in Azure App Services, is the Web App .
Thus, select the Web App, then click Next.
Now is the time to chose the template.
Before 2018 we had a template Node.js + Express but is has been removed. The others were left.
Anyway, you will see that an Azure App Services "Empty Site" is "smart enough" to "understand" that we are going to deploy a Node.js RESTful API on it and make it work.
Thus chose the empty Web App and click on "Create".
As wrritten previously you can use one of the 4 social networks account to sign in : Microsoft (live), Google +, Facebook, Github. For the demonstration I will use my Live account.
Then, Azure is provisionning your App Service in a few seconds.
And an ONE Hour countdown is starting lettting you play with the Azure App Service and the Azure Portal within this hour.
Before mid 2018, we were able to go to the Azure Portal from this UI and see the porperties of the Web App but it's over now. We were also able to change the API file code online using the App Service Editor (Visual Studio Code online), but it has been replaced by Kudu. However, this is not a bad thing, because we are going to use Kudu to deploy manually our Node.js RESTful API!
Deploying manually a Node.js API into the Azure App Service
There is a lot of way now to deploy some code to an Azure Web App. You can:- Use automated process (Azure Devops)
- Do semi-manual operation using an FTP transfer tool: FTP tranfer
- Use Git commands: for example, deploy code from a GitHub repo to the Web App using git . Actually it is a push with Git to the Web App. The Web App can behave as a real git repo. See this other post to do that.
- Do it manually:
- Using the Web App Build Service (Kudu) to pull code from a GitHub repo. See this other post to do that
- Directly upload files to the Web App file sytem using Kudu. This is that we are going to do now.
Downloading the code to deploy
We are going to deploy a REST API based on Node.js in our Azure Web App Service within a few minutes and test it.Download the Contact List REST API sample on my Github repositery.
Place the downloaded zip file in your local dev repositery and for Windows, right-click it and locate Extract All in the contextual menu.
On next screen delete the last segment of the path for not having this folder created twice as a main folder and a sub folder with exactly the same name.
You should obtain this view (for Windows) after having extracted the GitHub sample zip file.
Deploying the code manually (drag and drop in the browser)
You can then go back to the Microsoft Azure "Try Azure App Service" this time to use the button "Edit your code online" to open Kudu in this version of "try Azure App Service" (in the last version this link was opening App Service Editor).
You land on the Kudu welcome page
Next locate the CMD menu item and open it
then navigate to wwwroot by clicking on Site.
Click on the folder wwwroot to open it. Drag and drop all the folders and files excepted iisnode.yml and web.config (and of course, test, gitignore and readme) in the wwwroot folder in your browser.
The first upload takes time because of the node_modules folder but in a few minutes you should get this:
then drag and drop iisnode.yml, and finally the web.config file.

You can now come back to your Try App Service welcome page to click on the API url.

You should obtain this result. I customized the out of the box welcome page of the Try App Service Web App:
If you click on the "See contacts" button, you will see the Azure Web App serving the JSON of your Restful your API.
If you clcik on the "Use Swagger" button, you will be able to test your API with swagger UI:
Editing online a Node.js API deployed into the Azure App Service
One of the good point of Node.js compared to compiled language like .Net C# is that you can all edit online once deployed.Assume we want to add a new contact to our API. We just have to write it on the proper file and it is possible with Kudu, so open the file contacts.json located in the lib folder
Add a new contact and don't forget to save the file.
Now, if you test in Swagger you see that your change wasn't taken into account.
Why ? Because your data are in cache and you have to restart the web App for them to be taken into account. One good way to this on Windows server is to do an IISReset. Let's try to do this.
Of course, not a surprise, you cannot restart a Web App that way on the platform "Try Azure App Service". But I will show you a trick to do it anyway:
Locate the web.config file at the root of your site an open it.
Change something not really relevant for the file, like removing an empty line.
Don't forget to save your change, then, test again by refreshing your Swagger UI page. You notice that the page refresh is a little bit longer than usual. It is normal, a change in the web.config file makes restart the Web App and when refreshing, it is a little bit longer, because IIS must reload the dll and the cache to run your API. You can then see your changes appear!
More information
1. Postman
You can also test your API in Postman.
2. Mount a complete API with Swaggerize Express
If you want to know how to mount from scratch the API we have deployed in this post, I wrote a detailled post showing how to do it.Enjoy folks!

No comments:
Post a Comment